
 From a young age, I developed a love of all things Halloween. I can remember vividly asking to be a witch year after year. Putting on those long, pointy, black plastic fingernails, I began my transformation. I would sit still while my mom caked my face with gobs of white face paint, and worked on the tiny braids that would be undone for the perfect frizzed out hair. I enjoyed walking around the neighborhood to see all of the spooky decorations. The best part was the special night we would all go out as a family to pick out our pumpkins for carving. And let’s not forget all the CANDY!
Now that I have children of my own, I want to bring that same love and excitement for the haunted Halloween season into their lives. So, I have created this fun little project that isn’t too scary for the younger kids, and a real treat for all of us DIY craft moms.
Supplies for the Black Paper Project
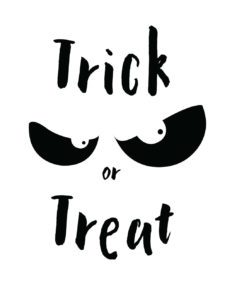
- Download Free Printables ———-> (Trick or Treat) (Smell my Feet) (Something Good to Eat)
- Black Card-stock
- Toner Reactive Gold Foil
- 2 way glue pen
- Scissors
- Paper towel
Gather all of your materials. Download the free printables.
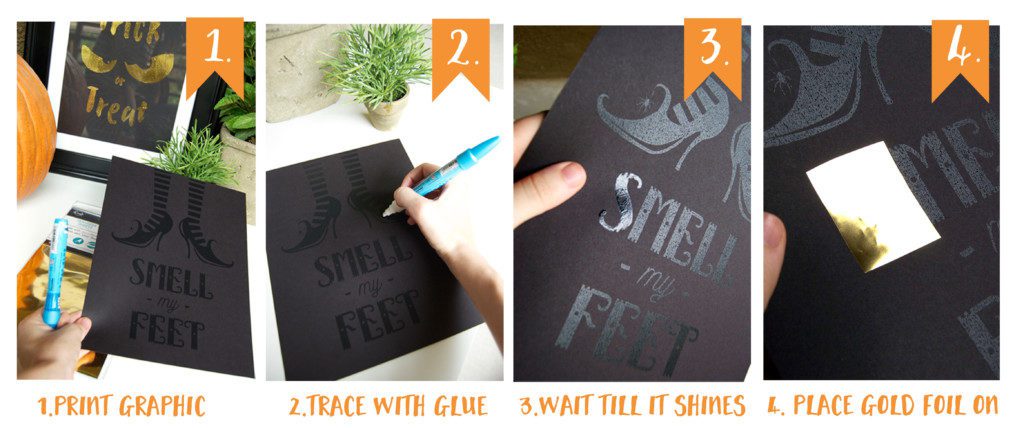
Step 1. Print the design on any printer! (I took my own black paper to Staple and had them print it for me! )
Step 2. Using two way glue pen, trace the printed design.
Step 3. Wait a few seconds for the glue to turn shiny and is no longer milky looking. (Don’t wait too long for the glue to change or the foil won’t stick to the glue.)
Step 4. Trim the gold foil to fit the area, placing the gold side up.
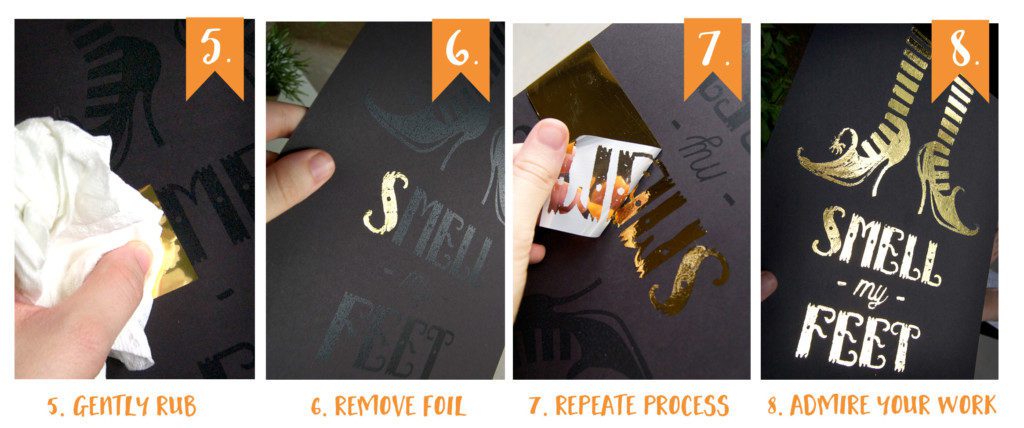
Step 5. Using the paper towel, gently rub the foil to help the foil transfer.
Step 6 & 7. Slowly remove the foil. Repeat steps 2-6 for the rest of the design. (Only work one area at a time to help the process go smoothly)
Step 8. Admire your work! The underlying glue gives the foil a painted quality. If the foil doesn’t stick in some areas… which can happen, it gives the design a more spooky, aged look.
Supplies for White Paper Project
- Download Free Printables ———-> (Trick or Treat) (Smell my Feet) (Something Good to Eat)
- White Gloss Cardstock
- Toner Reactive Gold Foil
- Hot Laminator
- One plain piece of paper
- Scissors
Download the free printables.
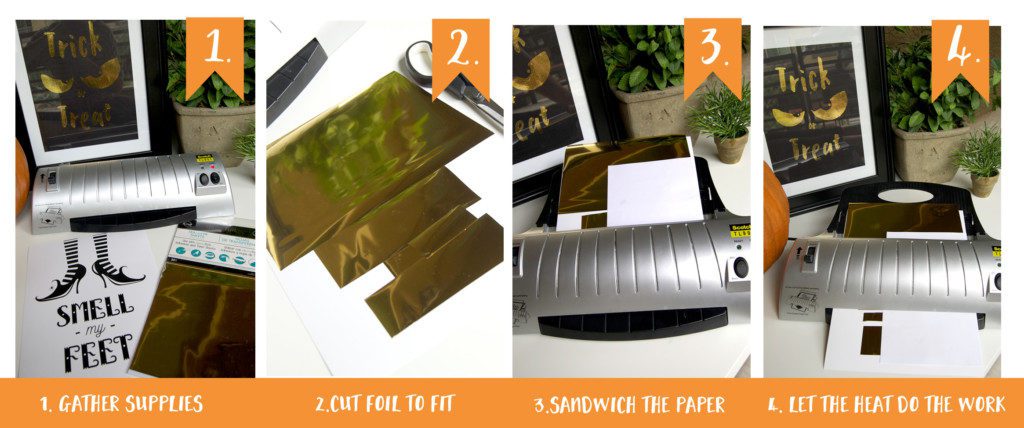
Step 1. Have the free printables, printed onto a high gloss white card-stock, using a LASER PRINTER!! It has to be a laser, because the foil reacts with the toner in the ink. (An ink jet will not work for this process!) I took mine to Staples and asked them to use a white high gloss card stock paper.
Step 2. Cut gold foil to fit the area of the project, place gold side up. You can place a small bit of washi tape to hold them in place if they are sliding around.
Step 3. Sandwich the gloss paper & foil pieces between a plain folded piece of paper. (This helps the foil stay in place while running it through the laminator.)
Step 4. Let the laminator heat up and then place the sandwiched project into the tray. Let the laminator do it’s thing! (Sometimes I run my project through a few times just to make sure all the areas were covered.)
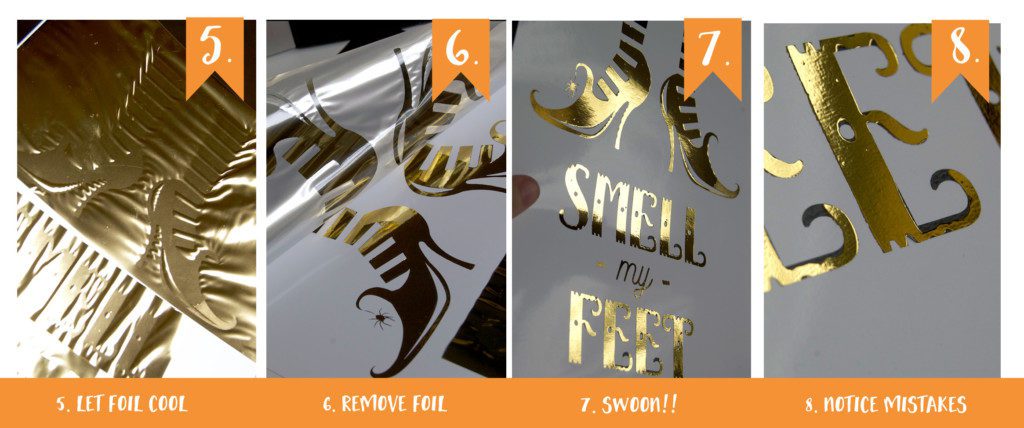
Step 5. Your foil should look something like this if the process worked. The foil looks slightly shrink wrapped onto the design. Let the paper cool off.
Step 6. Slowly peel the foil of the paper.
Step 7. Check out how it worked!!
Step 8. If you have some spots that didn’t take, try putting on a small piece of foil and run it back through the laminator, or use a glue pen to touch up those areas, as shown in the above tutorial.
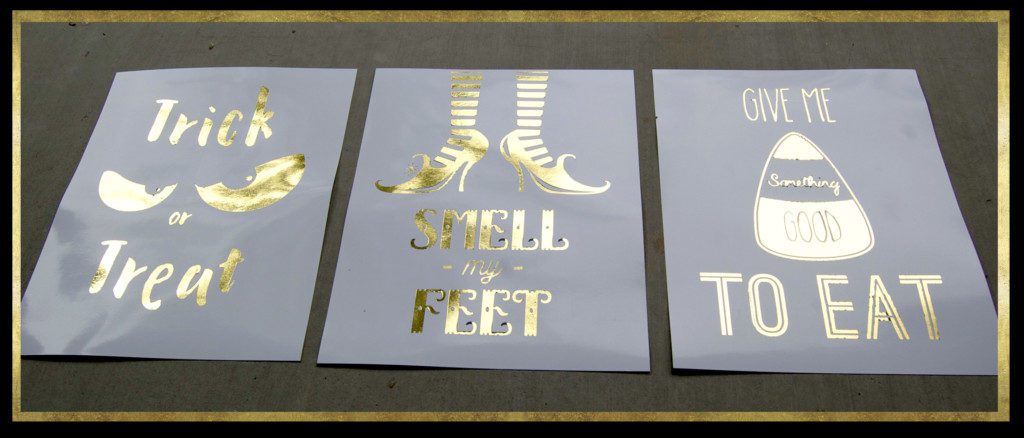
Side Note:
-I found that you can use the laminator method for the black paper using a laser printer. The results tend to be a little more choppy with gaps where the foil did not transfer correctly. (Because the paper has texture to it.) The smoother the paper the better the results.
-It is also important to know that some of the fonts and lines may be very small to trace, in this case use the tip of the glue pen, just do your best!







So creative and cute, Ashley! And… thanks for the downloads!
Comments are closed.