


Who has pillows that they once loved, but now hate?
Or perhaps you became a victim of what I like to call “White Pillow Syndrome”. Symptoms include falling in love with crisp and clean white, ivory or natural linen pillows in a discount home decor store. Further onset occurs when you’ve introduced said pillows into your home and before you know it the pillows are no longer crisp and clean and more often represent an old sock.
What do you do with these pillows?
In your current mental state you become incredibly bothered that you’ve tried all forms of white vinegar, bleach, good old-fashioned elbow grease and still nothing is bringing these guys back to their youth (which was like 6 weeks ago). So what do you do with them?
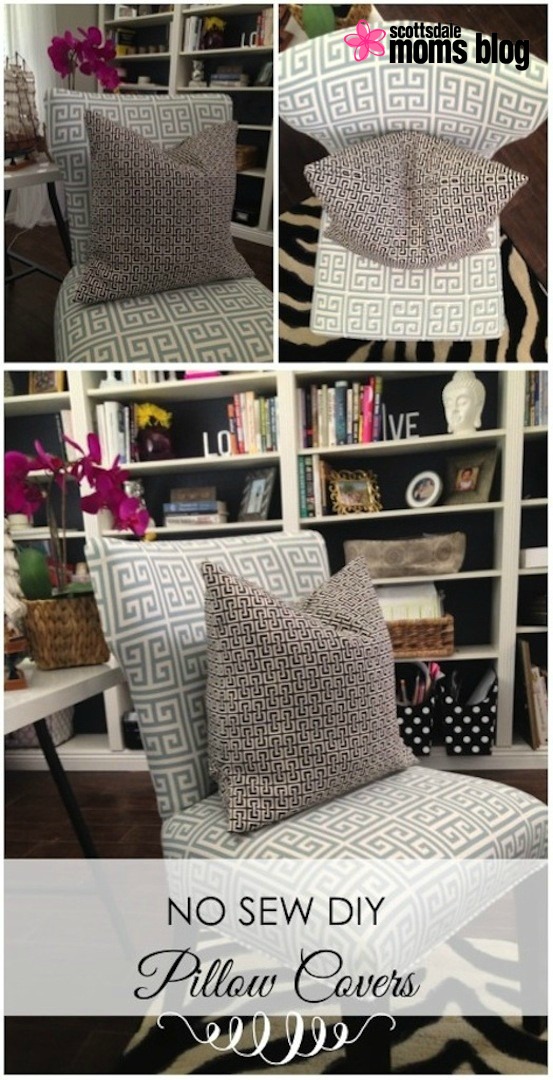
You whip-up new pillow covers! The NO-SEWING-INVOLVED KIND!
Another note before I show you how… I can sew. So if you can sew, DO NOT think that you will be kicked out of the sewing club, or that your great grandmother will roll over in her grave. No one is taking your sewing card, you are just using your time very wisely, (since fitting in a full-blown sewing session between all the other things on your plate is just not in the cards anytime soon).
Supplies:
If your pillow is standard size (18″ x 18″) you will need 3 pieces of fabric cut in the dimensions listed below:
WATCH OUT FOR THESE EASY TO MAKE MISTAKES:
You are actually making the case inside -out to allow for all of the seams to be nicely tucked inside the case. Make sure your fabric print is facing inward.
Leave a seam allowance (the amount of fabric left on the edges for glue) of at least a half-inch, meaning do not glue on the very edge of the fabric.
LET IT DRY! Fabric glue is really wet when it comes out of the tube, but gets tacky as it dries. It may look like the fabric is not going to stick together, but just keep pressing it together and as it dries a bit it will!

From here you are going to glue the inside edge of both of the 20 x 15″ pieces to create a fold for where the pillow cover is going to open.

After gluing the inside edges of the 20 x 15″ pieces, place those pieces, one at a time, exactly over the larger 20 x 20″ piece. Then glue all of the edges together, leaving the half-inch seam allowance on all sides. NOTE: The smaller pieces that create the envelope fold should overlap; because they overlap, you will end up gluing those edges together too.

DO NOT GLUE where you see the yellow arrow… this is where you will insert the pillow.
This is where your patience really is a virtue (and where you should use your blow dryer). The glue has to dry completely. 24 hours is recommended, but 3 hours is probably fine too.. blow dry for as long as you can take it, then come back in 2 hours and 55 minutes (wink wink).
Once the fabric glue has dried, you will carefully flip the pillow cover print out. It will start to take shape, and probably look a little funny while you’re pushing out all of the corners and stuff.


Insert your pillow, and you are done! Repeat as necessary!
Don’t be a victim of dingy pillows, and don’t think buying new is your only option! With just a bit of fabric and about 35 minutes, you can have a whole new look!
 Expert post from Luxe Baby")
")


")